Adult Activity Inspired by Jun Kaneko’s Dangos

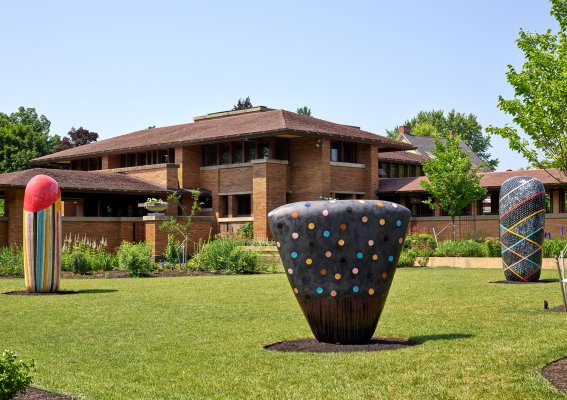
Jun Kaneko layers tons of clay over weeks and months to shape some of the world’s largest ceramic artworks. With a touch of humor, the artist refers to these objects as dangos, after a Japanese term for dumplings and other gently rounded forms. He finishes his dangos with colorful patterns of geometric shapes, abstract marks, and drips. His work is currently on view in the exhibition The Space Between: Frank Lloyd Wright | Jun Kaneko at Frank Lloyd Wright’s Martin House in Buffalo.

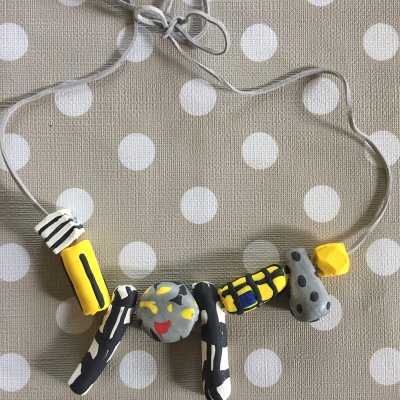
In this activity for adults, we’ll walk you through how to make a polymer clay beaded necklace inspired by Kaneko’s dangos.

Installation view of The Space Between: Frank Lloyd Wright | Jun Kaneko at Frank Lloyd Wright's Martin House. Photo: Brenda Bieger for Buffalo AKG Art Museum

Getting Started

  • What patterns and colors would you use to decorate your own dango?
  • How do the different sizes of Kaneko’s dangos change how you interact with the work?

Materials

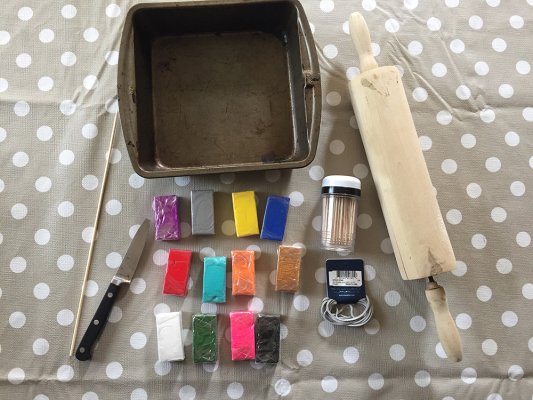
  • Selection of colored polymer clay (such as Sculpey or FIMO)
  • A sharp, pointed tool (toothpick, skewer, or thick needle)
  • X-Acto knife (or other cutting tool)
  • Rolling pin (optional)
  • Oven-proof glass or metal baking sheet
  • Oven, set to 275 degrees Fahrenheit
  • Thick cord to string your beads

Basic Instructions for Working with Sculpey Clay

  • Start with clean hands and work area
  • Knead clay until soft and smooth
  • Shape clay, pressing any separate pieces together firmly
  • Bake in oven on an oven-proof glass or metal surface at 275 degrees Fahrenheit for 15 minutes per 6 mm thickness. DO NOT USE MICROWAVE OVEN. DO NOT EXCEED THE RECOMMENDED TEMPERATURE OR RECOMMENDED BAKING TIME.

(Sculpey clay won’t dry out until you bake it.)

Artmaking Activity

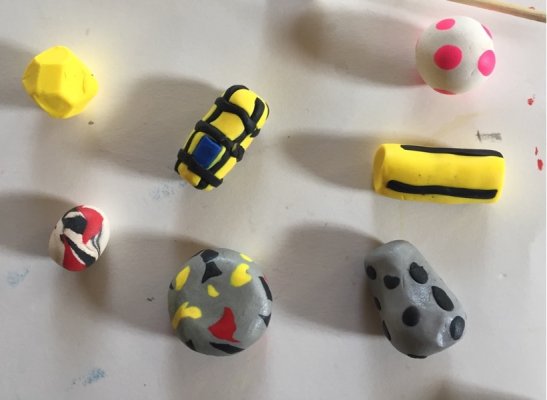
1. Knead your clay and shape into smooth, round balls. This is probably a skill you learned when you were in pre-school—super easy! You can also make other shapes, like flat, coin-shaped beads; long and narrow beads; or oval beads—see the picture below for ideas and feel free to experiment.

2. Add shapes and patterns to your beads. For polka dots, try making teeny tiny balls out of clay crumbs and then rolling your bead into the crumbs. Then, roll the bead in your hands again to make sure the dots are kneaded in. You could also try adding stripes or geometric shapes, or creating a marbled mix.
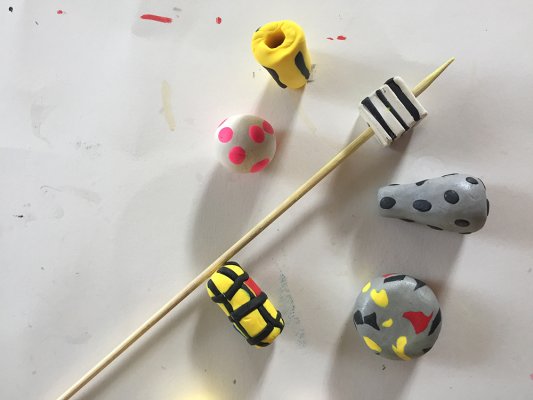
3. With your sharp, pointy tool, carefully poke a hole through each bead. If your clay is too soft, the bead will squish as you poke the hole, causing the shape to warp. If this happens, try waiting a few minutes for the clay to get a bit harder or briefly stick your clay in the freezer.

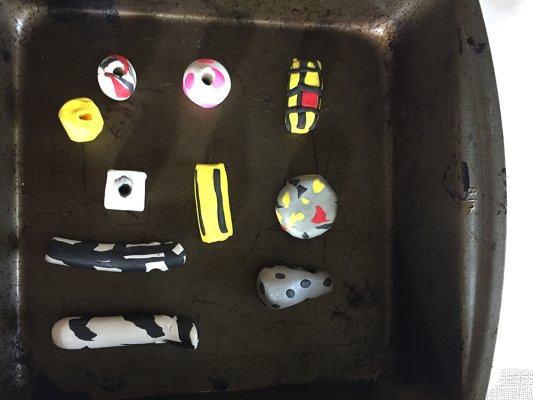
4. Place your beads in an oven-safe glass or metal pan and bake them at 275 degrees Fahrenheit for 30 minutes. When finished, remove the pan from the oven and let your beads cool.

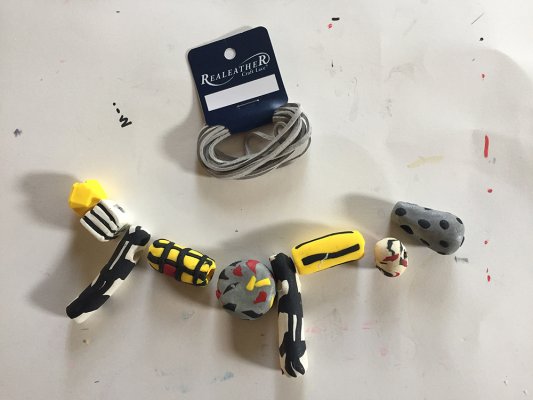
5. Once your beads are completely cool, string them onto your cord. You can add a clasp to the cord or just tie a knot to fasten.

All done!