Creating a Print: Line Etchings
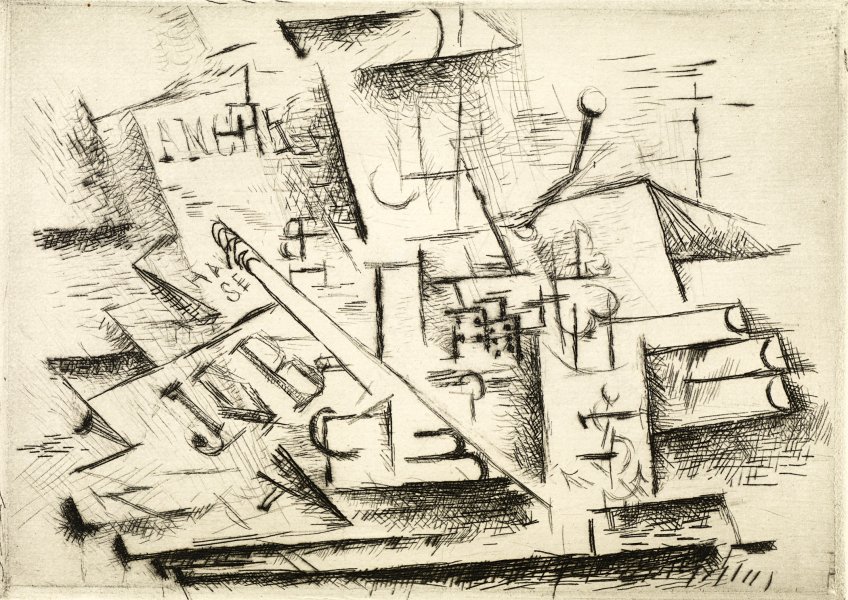
Featuring Georges Braque's Job, 1911
Twentieth-century French artist Georges Braque made many contributions to the art world. A co-founder of Cubism along with Pablo Picasso (Spanish, 1881–1973), Braque created works that contain geometric shapes, a variety of lines, and simultaneous perspectives. Braque started his career as a painter but his art evolved over the course of his life. His etchings, which he created toward the end of his career, embody his Cubist ideals. Inspired by Braque’s printmaking, this project explores the process of creating an etching.
Georges Braque
(French, 1882–1963)
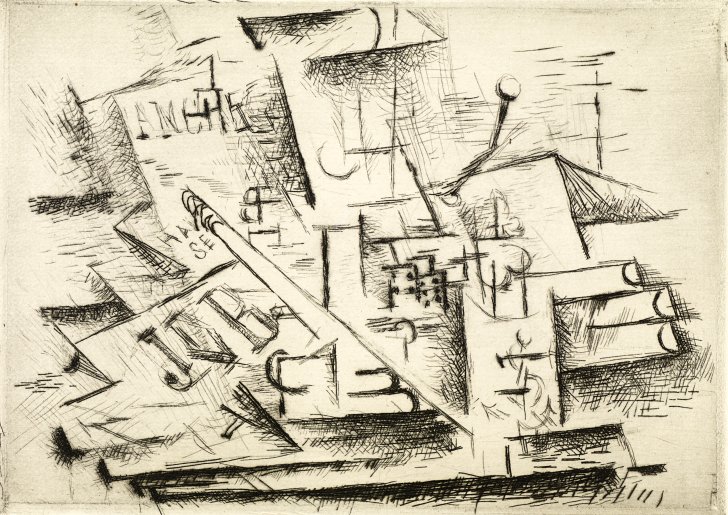
Job, 1911
Etching, edition of 100
5 1/2 x 7 3/4 inches (14 x 19.7 cm)
Collection Albright-Knox Art Gallery, Buffalo, New York
Gift of A. Conger Goodyear, by exchange, 1949
P1949:3
Georges Braque was born in France in 1882. Trained as a house painter and decorator by his father, Braque studied art in the evenings. Beginning his career as an impressionist painter, Braque visited a Fauvist exhibition and, inspired by the artists’ uses of bright color, adopted their style. Braque’s art began to evolve further after he became inspired by the artwork of Paul Cézanne (French, 1839–1906), especially Cézanne’s use of multiple perspectives. In 1909, Braque developed a friendship with fellow artist Pablo Picasso. Through collaboration and working side by side, Braque and Picasso developed Cubism, producing monochromatic complex multiple-perspective paintings. The two continued to work closely together until 1914 when Braque served in the French Army during World War I.
After being wounded in combat in 1916, Braque continued to create art. His artistic style evolved further as he focused on color, texture, and the creation of still lifes. In addition to painting, Braque also created lithographs, engravings, and sculptures.
Etching is a printmaking technique. To begin, a metal plate is treated in an acid-resistant wax-like coating. Using a needle tool, the artist draws his design into the coating, exposing the metal plate. Once the drawing is done, the plate is submerged into an acid bath. The acid will eat away at the metal that is exposed, creating engraved lines. Once this process is complete, the excess coating is removed. Then, using a tool called a brayer, the artist will roll ink onto the metal plate. The ink collects in the engraved drawn lines. The artist will wipe away any extra ink on the surface of the plate. To create a print, the artist drapes a paper over the inked plate, applies pressure, and then lifts off the paper, leaving a print of the inked engraved lines on the paper. In art, plates can be used many times to create multiples of the same print.
Georges Braque’s etching Job, 1911, features a mixture of Cubist characteristics, including lines, geometric shapes, and simultaneous perspectives. The figure and surroundings are composed of straight lines with various thicknesses. Shapes are lightly shaded with crosshatch marks. A two-dimensional print created with multiple perspectives gives an illusion of three dimensions. The viewer can piece together the different elements of the print to visualize the identifying features of a person, pencil in hand, likely at a desk. The word “JOB” is seen as rectangular papers that appear to be scattered and floating around the figure. The scene depicted in the etching appears busy and hectic, filled with fast sketchy lines and sharp angles, which could be intended to represent the hustle and bustle of work life.
etching: to cut or carve a design in a surface
printmaking: the creation of prints using an etching
Cubism: early twentieth-century art movement characterized by geometric shapes and multiple perspectives or viewpoints
For a fun activity to support class discussion and visual literacy, have students work in groups to piece together clues about an artwork like a detective. Students should study and discuss the different elements of the work. They can identify key features and assess their feelings about what they see. Ask students to consider what other clues can be collected by looking at the title of the work. Based on the evidence they have collected, students can draw conclusions about what the artwork represents. This detective activity can be a way to approach looking at and talking about art.
Students can begin by focusing on the elements of shape and line in Braque’s Job, 1911. What types of lines do they see? What shapes do the lines create? How are they defined?
Do the shapes delineate any human features or objects? What does the person seem to be doing? Is there text present in the work?
Based on their discoveries thus far, how does the artwork make them feel? How would each student feel if he or she were the person in the etching?
How might that feeling relate to the title? What might Job mean?
What are the detectives’ conclusions? What was Georges Braque portraying?
Breaking down the different layers of meaning in an artwork allows students to build abstract thoughts based on concrete observations. It is an interactive way to teach visual literacy in your classroom.
Students should begin the art activity by drawing thumbnail sketches of what they want to create in their prints. Thumbnail sketches are an important part of this artmaking process because of the delicate Scratch-Foam surface. Remind students that whatever they draw will be printed in reverse from their etchings. If students wish to include text, they will need to write it backwards in their drawings.
Once students have chosen the images they wish to re-create, they should draw them directly onto their Scratch-Foam boards using pencils or wooden skewers. Students should apply enough pressure to create deep marks in the foam. Remind students that any lines they create will appear in their prints.
When students have drawn their images into their foam boards, begin the printmaking process by preparing their ink and brayers for them. Pour a small amount of ink onto hard, nonporous surfaces such as trays or tiles, then smoothly roll out the ink using brayers. Be careful to avoid blobs of ink building up on the brayers, as they can clog up the drawn marks on their Scratch-Foam boards with ink. Next, students should lightly roll the brayers over their Scratch-Foam boards. After the surfaces are inked, the students should flip their papers on top of their inked foam boards and apply pressure to their entire papers. If you have an additional clean brayer, students can roll it over their papers to evenly distribute pressure. Finally, have students gently lift their papers, revealing their prints.